Sunday, November 27, 2011

Recent wallets and current goings-on

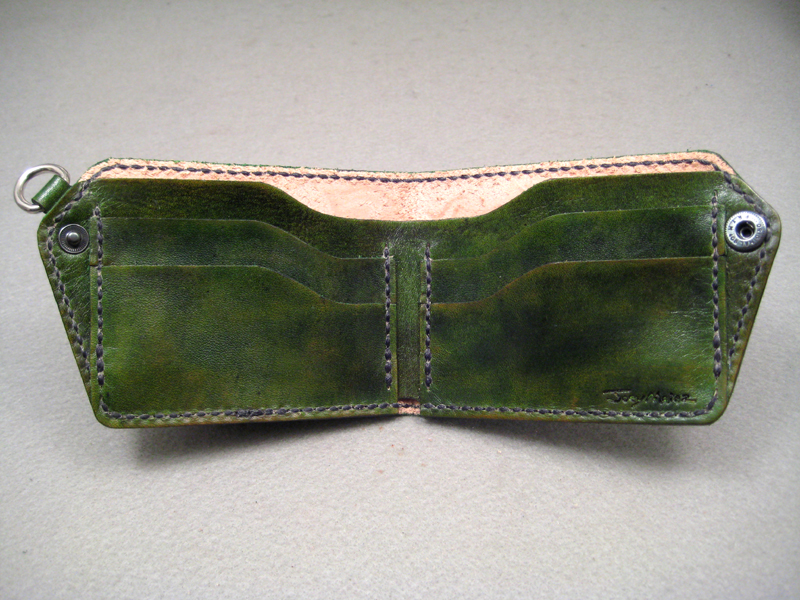
There was a wallet I made as a Xmas commission last year, for a friend to give to another friend, and it was recently involved in an accident. It took a trip through the washing machine, and they wanted to see what I could do to fix it. Here's the washed leather after disassembly:

It clearly needed some help. What it took was to be deglazed multiple times, to get rid of any old dyes and sealants, a lot of dye and a lot of oil and conditioning. The end result:
 
It still had some variations in the dyeing, especially inside on the pockets, as I don't think all of the original sealant came up, but at least it's close to it's original coloring.

Onto the next wallet. This was a commission for a Bar Mitzvah, and the idea was to place imagery from a Menorah on the outside, and the inside was to be inscribed in Hebrew with his name and the date of the ceremony. Luckily I work with a Hebrew bibliographer at the library, and he was able to help me with the translation and font choice.


My camera doesn't handle black leather very well, but I'm told the recipient was very happy with his gift. Up next was a birthday commission for the same individual who commissioned the above wallet. His wife wanted to replace his aging biker trifold with something more personal, and suggested using Ray Harryhausen fighting skeletons for imagery. This was a fantastic idea, and I set about making a sketch for something that would be recognizable as such without directly ripping off anyone:


This design snaps securely shut and utilizes a chain, just like a biker wallet, but without the bulk of a trifold. And last but not least, a couple of photos of current projects. I'm in the middle of making a molded leather holster for a gigantic pistol, so here's a photo of the in-progress molding:
And here's a pic of some recent additions to the leather stash. I walked into the store intending to buy rivets, and walked out with rivets and eight hides. The lure of odd leather at a great price was simply too much to ignore:

Saturday, November 05, 2011

I was recently approached about doing some restoration work on a clutch and a wallet. They were made about 60 years ago and were gifts to the client and her mother. The clutch had been obviously cared for and was just a little worn, and the job was to replace two sections of broken edge braiding and replace a wrist loop. The wallet was in worse shape and was dried out and stiff, and all of the edge braiding had to be replaced. Plus, the interior pockets weren't very useful, so I changed the inside to include more card pockets and two sections for cash. Here is the wallet after removing the original edge braiding:


And here's the finished wallet. I redyed and oiled it, added a more practical interior and all new edge braiding:


I forgot to take pictures of the clutch before I started working on it, but it was in pretty good shape. There were some small areas of dried leather, but a good cleaning with saddle soap improved those. The original wrist loop was a simple strap, and she wanted something that looked nicer and could also be tucked into the clutch when not in use. I opted for a plaited strap positioned where the zipper closed, so it could be zipped into the clutch. The edge braiding had some broken sections where it curved around the bottom, and here's a photo of where the old braiding ends and the new begins:


Sunday, October 16, 2011

Random Work

OK, so after a frustrating amount of time spent wrestling with the new Blogger interface, I've finally posted some photos of recent work. First up is a good illustration of my recent obsession with whip making, which was sparked oh so many years ago by Indiana Jones. This is the second leather whip I've made, and is a bullwhip. It's about 54" from the butt of the handle to the end of the braided portion (thong), and if you include the fall, cracker and wrist loop it's right at seven feet. As this definitely counts as a learning exercise, I've been using oily utility leather for all the strands. It's not very strong, especially when you start tapering the strands, and I had to splice a bunch of strands that busted while plaiting, but I'm nowhere near confident enough to attempt this with kangaroo.
There is a wooden dowel in the handle, which then tapers down to a core, which extends all the way down to the end of the braiding. Here is where I deviated from the normal method of construction - usually this would have another plaited core inside, but the leather isn't strong enough to get a good, tight braid with the thin strands. I had another core laying around from a paracord whip project that never got started, so I used that instead. It's a length of canvas that was tapered, rolled up and glued, and surprisingly it worked perfectly.
It's much tighter than my first whip, the stockwhip, and it unrolls smoothly and is much more precise. However, the wrist loop at the end of the handle seems to me to be unnecessary. It's not quite long enough to fit around my wrist and still allow for wrist movement, so it ends up slapping me in the wrist whenever I crack it. 
Up next is a tool bag that I made for my dad. He recently had a birthday and, due to the immense amount of tools he owns and uses, I thought he could use a burly leather bag to lug tools around.

 It's the same utility leather as the bullwhip, and the bag has one large compartment and two side pockets. I'm hoping this will look better and better the more beat up it gets.
 
There's a project in the works that required a braided leather wrist loop (more to come on that later), and I ended up cutting the strands way too long. I couldn't let them go to waste, so just for fun I made them into this, which is sort of a quirt:

It's a little too floppy to be of any practical use, but it was fun to crank out.

And finally, I recently saw My Neighbor Totoro for the first time, and was inspired to carve a brass acorn for my girlfriend.


Sunday, August 14, 2011

A cycling bag for Persimmon

For the birthday of my lovely girlfriend I decided to make her a cycling bag. She commutes to and from work by bike and needs to carry clothing, food, tools and sundries, and has been resorting to strapping a purse to the rear rack with bungee cords. I thought that a design with the least amount of removable parts would be ideal, but it would need to be easily installed and removed. I also wanted it to double as a purse while off the bike, and she's a sucker for giraffes, so the following bag was born:


The strap is removable, and can be carried in the bag while it is strapped into place.

Continuing the giraffe theme, there are giraffe heads at both ends of the bag for the purpose of mounting a rear blinking light:


The underside serves two functions - to hold the bungee cords and also to carry the u-lock. When in place on the rack, the hooks can be snaked under the rack and hooked onto the d-rings, providing a simple and secure method of holding the bag to the rack. As they're attached to the bag there isn't any chance of losing them:

The u-lock in place. It slides into a slot on the underside of the bag and eliminates the need to carry it elsewhere:


The bag in place on her bike, Persimmon:


This better illustrates how the bag attaches to the rack. It doesn't matter how much gear is stowed in the bag, as the low attachment points will keep it firmly in place no matter what:

A better shot of the u-lock in place. The bungee wraps around it and keeps it from sliding out:


Camera case and edge braiding

Here's a recent project - a case to protect an Argus Argoflex 75 camera. The straps are built into the camera, so all that was needed was a case to keep it from getting scratched. It needed to allow access to the tripod mount, shutter advance, attachment points for the flash, the film indicator and the shutter. Of course, the lenses needed to be easily exposed without having to remove the case, so when the flap is opened there is access to the viewfinder and the lenses and the case stays in place.


Current project - making a replacement wallet for one of my favorite clients. He loves the fact that the bright blue of this robot wallet sparked so many conversations, but unfortunately the original wallet was misplaced. Luckily I hang onto all the designs and patterns from previous jobs, so replacements are a snap. Here's a couple of shots of the edge braiding in progress: